Creating Pathways in the Fairy Garden
 In my opinion, the best thing about planning my next 'miniscape' is that there are many options for designing fairy gardens. What I mean is that there are different miniature accessories, fairy houses, landscape materials, and miniature plants from which I can select the essential pieces. Once I have decided upon and gathered all my supplies, I can begin to design a unique scene and make my garden special. To find ideas, I tend to watch videos and look on social media websites. The video, Fairy Garden Pathways, provides much helpful "how-to" information, plus Step-by-Step Recipes with links to products. In addition, I have found that talking to other gardeners helps me learn new techniques.
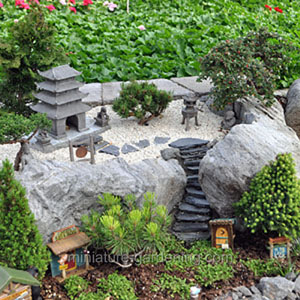
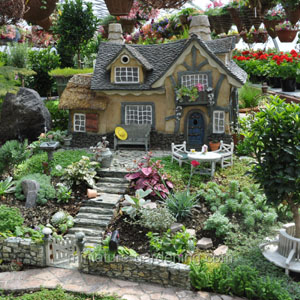
When I started fairy gardening, I had no idea that there were so many ways to create a simple garden path. Little did I know that ‘simple’ is the wrong term for something that can change the personality of your garden in a second. When I see beach sand leading to a blue picket fence, I think of someone living near the ocean, or I visualize a path that fairies take to see a mermaid sitting on a large rock splashed by waves. When I view large stones forming a pathway and framing smaller pebbles, I think of it leading to a cottage in the woods with a large bonfire pit in the backyard. These paths hold their personalities that can be designed to match the existing theme of the garden.
 When you start creating a path, you need to border the location of the walkway with edging material. Next, cover the space with hardscaping materials, to achieve the style of the pathway that you are trying to create. For example, if you want to form a natural stone walkway, fill the edged area with sand, and pat it down (I like to use a small piece of wood for this step.) On top of the sand, place stones to cover the area for the pathway, fill in the spaces with the mini path and patio mix, and pat it down again. Once you have cleaned off the excess mix with a paintbrush, spritz the stone pathway with water, and the beauty of the stones will appear. Repeat the spritzing a couple more times during the day. It will take two to three days for the mix to harden so that soon the fairies can enjoy their new pathway. Add miniature plants along the route to soften the edges.
Another popular path would be one created with a dry riverbed kit. To define your space, use edging material or rocks. Next, take a black piece of gardening fabric and cover the soil. On top of the fabric, pour fine pea gravel or pebbles to frame the entire path. Gently brush away any excess gravel, and your pathway is ready. Add a fairy, bike, or wagon for added interest.
 One of my favorite types of paths is stepping-stones. Whether you select agates, ancient squares, wooden circles, porcelain, or mosaic stones these hardscape pieces make an easy-to-do, but a refined pathway. You can lay the hardscape in a straight line or make them slightly crooked to add a little personality to the space. If you want a pop of color, consider using bright blue decorative pebbles to define the path and larger blue porcelain tiles to create a stepping stone feel as well. You can also use a simple brown pea gravel to add a more rustic sidewalk. An especially attractive garden path would be large mosaic stepping stones filled in with green moss, spraying occasionally with water to keep the plants alive.
I know next time I start designing a fairy garden; I will give much thought to my pathway choices. Since adding hardscape materials attains such a large impact on the theme of the garden, I want to make sure that I choose materials and decorations within the path that will capture the attitude, which I am trying to portray within my newest miniature fairy garden.
Comments
{{ errors.first("comment") }}